Polka Dot Dress
What would you create with a polka dot knit? About a month ago, I found out about a new fabric store in Austin called The Fabricker. I had been looking for a specific color and type of fabric for a project, and was unsatisfied with the selection of apparel fabric at JoAnns. I actually ended up finding the fabric I needed at my favorite fabric store here in Austin- The Common Thread– but while at Fabricker, I did see this fun polka-dot knit fabric. I knew that it would be perfect for something summery for Fiona, so I got a yard and a half of it, along with a coordinating purple knit. Disclaimer: If anyone is interested in recreating this look, what follows is not a tutorial to make a reversible outfit. I imagine I may get some people coming over here from PRP like when I posted the Pallete Dresson my other blog. In order to make a well-written and “followable” tutorial, I would want to make another one without errors and take notes on the best process. I have included links to what I referenced, and there may be other better tutorials like this out there. I do not take any responsibility for drop-kicked sewing machines if anyone starts to follow this, and then gets to the parts where I use such language as “stuff” and “somehow this happened” and “I’m not quite sure” and “I think.” This is to help me remember most of what I did if I try this or something similar again. It is a documentation of my creative process and how I achieved a sewing goal with some mistakes along the way. If you are good at sewing/figuring out patterns, you could probably see the photos and know what I was doing and probably be able to recreate it in a more efficient manner than I did! ******
MOTIVATION: Fiona needs summer tops & PRP sew along INSPIRATION: Fabric & keyhole cutout detail via. Crafterhours NEW TECHNIQUES: Making clothing reversible, adding elastic to create V neckline gather, sewing with knits
PROCESS
I was first thinking that I wanted to make leggings, but then decided on a circle skirt and a leotard. For the circle skirt, I followed Dana’s circle skirt tutorial from MADE. I did make one deviation from the tutorial however–instead using elastic for the waistband, I decided to try and make a yoga pant type foldover waistband. I hoped the knit would be stretchy enough to keep the skirt on and it worked. To do this, I cut a rectangle from the contrasting knit fabric. It was 4 inches by 20 (the waist measurement). I then folded it in half lengthwise and sewed the ends, and then keeping right sides together, I sewed the waistband to the skirt. I didn’t take pictures of this, but here is an excellent tutorial for this exact thing from Little Pink Monster. This was the easy part. The hard part was figuring out how to make a reversible leotard. I pretty much figured it out (with a lot of trial and some error) on my own without a tutorial. I did do a few searches online for tutorials, but didn’t come up with much- and since my late-night sewing time was approaching the wee hours of the morning and I just wanted to get to sewing, I just made do with the only thing I found right away, which was from Burda Style- Magic Seams. Now, AFTER finishing the garment, it seems I have seen several tutorials for reversible garments. It is like when you learn a new vocabulary word and hear it all the time, or when you find out the guy you have a crush on rides a motorcycle and you see motorcycles everywhere- or (maybe a bit more relatable) when you are pregnant and then you start noticing everyone else who is pregnant. Anyway, here’s one from Kojo Designs which looks really cute. I would have to do this process again and take notes to write up a formal tutorial, however for my future reference at least for the next time I want to do this, here are some pictures I took of the major steps. 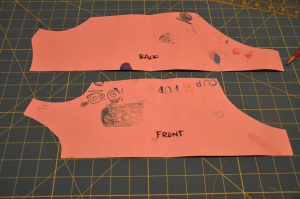 I made a pattern by roughly tracing an existing leotard and free-handing a few adjustments.
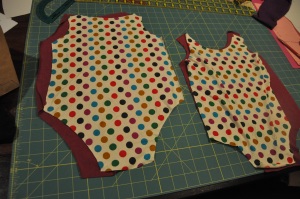
Then I cut out 2 backs and 2 fronts. One from Fabric A (polkadot) and Fabric B (contrast) for each pattern piece. 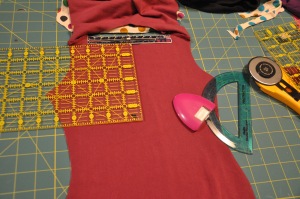 Next, I had this great idea to create a circle cut-out on the back. This happens almost every time I design something myself. I am partway in and decide to do something different than I originally thought. I like how organic this part of the process is when I am creating something- plus the fun of not knowing exactly how it will turn out in the end. Anyway, I thought a cut-out circle would look cute along with the polkadots and also be really summery and almost like a swimsuit detail. I took this inspiration from Crafterhours which had been pinned by someone I follow on Pinterest. Instead of it being a “keyhole,” I just wanted a circle. I did a few things differently (plus I am using knit which allows for some fun detail) so I will give a bit of explanation here. First, I spent a precious 20 minutes searching for a compass- which I had bought because I had grown tired of using random bowls and lids to trace when I wanted a perfect circle. I never found my compass (it has since erschienen) so I had to resort again to the bowl.
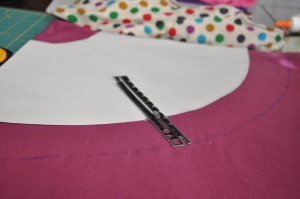
 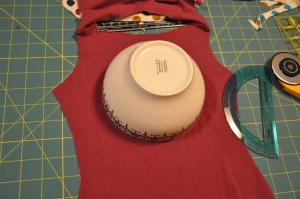 At this point, I had sewn the shoulder seam together only. I used a ruler at the top to find the midpoint (and eyeballed it) to put the bowl in the right spot. Then I traced the circle on the garment BACK.
 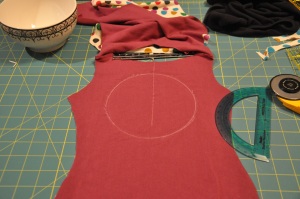 Disregard the line down the middle. Thats me deciding whether I wanted the top to open like in the Crafterhours tutorial. I decided to try it without, and just see if the neck would be stretchy enough to get on and off easily without needing a neck closure. It was!
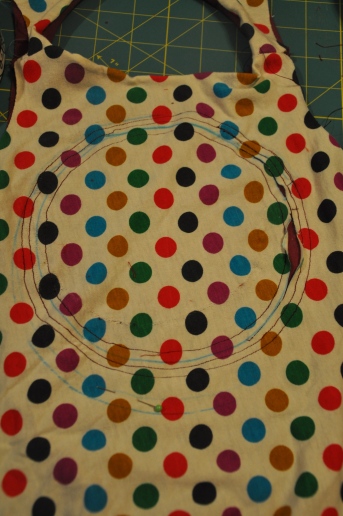
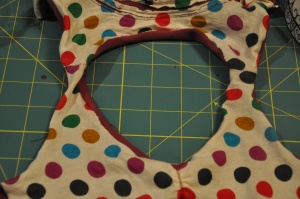
 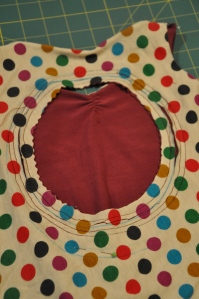 Before cutting it out, I stitched around the circumference of the circle. I had another idea though. I thought since I am making it double-sided, I could do a little exposed seam type detail on the FABRIC A side. To do this, I drew another circle 7cm outside of the original one. I added another circle 5 cm. outside of that one. I stitched (a bit unevenly as you can see) on top of these lines. You know what, I just lied. I’m pretty sure I didn’t bother drawing the circles out before stitching them. I know I didn’t have multiple bowls running around on the table, and my compass wouldn’t have been large enough anyway. What I must have done is this: I stitched the original circle, then using the lines on my sewing machine as a guide, I just stitched two additional circles outside the original one. To summarize, stitch as many concentric circles as you want- and I like having them unevenly spaced out inside each other. Next, as you can kind of see here, I cut where you can see the blue marker line. This is in BETWEEN the circles. DO NOT cut through the whole garment, that will cut out the circle. ONLY cut the TOP layer, which reveals the contrast fabric beneath. Repeat for the inside of the outer concentric circle.
The knit fabric will curl up a bit, hiding any uneven stitching you may or may not have. I used my rotary cutter which has a pinking edge blade (I love this) to cut out the innermost circle. For the inside circle, make sure you do cut through both layers. You then have 2 fun circles you can give to your daughter to play with. Or make doll circle skirts with. 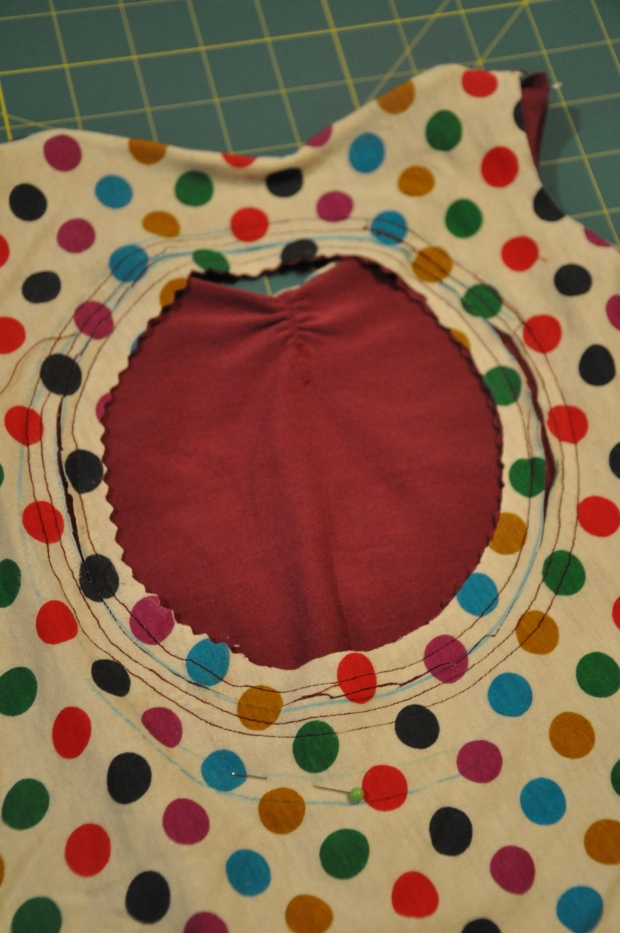 Just FYI, I cut in between the first concentric circles, then I cut the big circle opening, and then I took this picture before I had cut in between the outside concentric circles. Other steps I completed at this point was to sew the BACK pieces together at the neck. I don’t have a serger, so I used a stitch recommended on my machine for stretchy fabrics. The 2 FRONT pieces are NOT sewn together yet, because I wanted to add a gather first. The next interesting thing worth displaying here was to create the little gather at the neckline. I probably could have cut it more like a V, but it still worked with just a scoop neck. On the WRONG sides of Fabric A and B I pinned 2 inches of skinny elastic thusly:
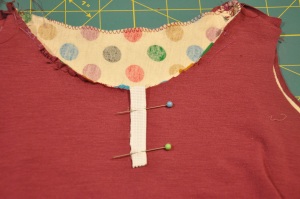
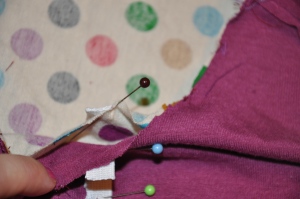 This picture looks confusing. I think I am trying to show here that there are 2 separate pieces of elastic on each side. It is also important to note that you must stitch them separately- Don’t sandwich them together- keep picturing how it is reversible. So you are only stitching the elastic onto ONE layer of fabric.
 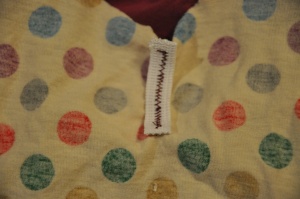 I stitched it down, crossed my fingers…..and flipped it right side out to see if it worked.
It did! Looks kind of cute already, right?
Next time I do this I am going to take better notes. I was hoping just taking a picture would jog my memory later. This is showing that I stitched the front piece neckline together. I was worried about the bulk of the elastic pieces at the top where they meet. It was a bit tricky but not too bad. You then flip the armhole curves of Fabric A and B to meet each other & stitch them together.
This is where sewing a reversible garment creates a slight headache. Or maybe just because by this point it was past 3AM. The point is, you have to keep in mind that you want to stitch the Fabric A and B pieces together, but you don’t want to sew the armhole or neck hole shut AND figure out how to sew it in a way where you can turn it right side out later.
How do you achieve this? My first answer would be a degree from a sewing design school. Without that, just try staring at it for a while and trying to envision what needs to happen in your head. Plus take notes. I wish I had taken notes! Instead I took a few measly pictures.
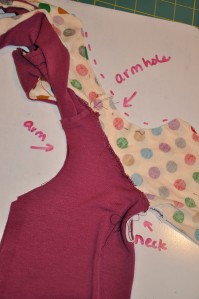
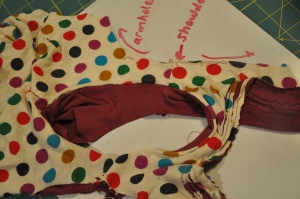
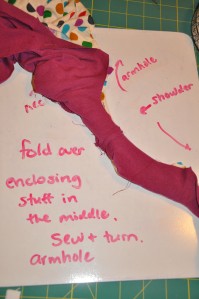
This picture is supposed to help me next time I do this. Hmmmm……do you like the use of the word “stuff?” Remember, 3 AM by this point.
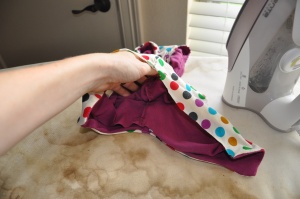
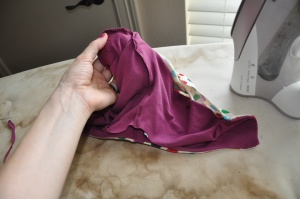
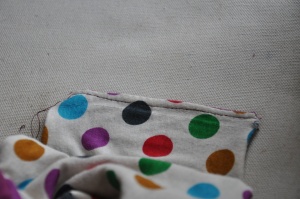
OK. The Burda Style tutorial I referenced earlier confused me here at steps 8-11. Here is what happens though. In the first picture above, the right sides of the shoulder seam is facing up, splayed out so that the wrong side of the fabric is flat.
You then pick up the opposite shoulder seam and place it on top of the splayed out shoulder section. Then you fold over Fabric B (purple) to match the armhole seam of Fabric A (polkadot). Then you sew this little sandwich together and then turn it right side out again.
Maybe there is another way to do this, but magically it worked.
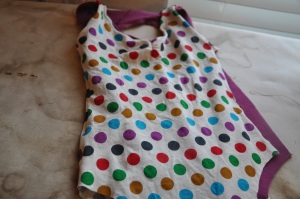
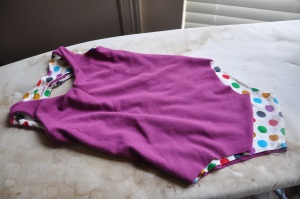
SO, in the above picture I have the neckline and the armholes finished. Do you see it is daylight now in the picture below? When I hear the neighbor starting his car to go to work and the depressing sounds of birds chirping, I unplug the sewing machine, because at that point I don’t know if there are minutes or a few hours before the baby wakes up and wants to be fed.
With a few hours of sleep, I am ready to finish this! I sewed the side seams together. You are sewing Right Sides together of Fabric A to A. and the same for Fabric B to B. Don’t sew Fabric A to B.
MISTAKE ALERT: Here I pinned both sides of the crotch together and sewed. Since I wasn’t sure how I was going to achieve the reversible thing to the end, at this point I didn’t think about needing an opening through which to turn the garment. So, although you see both sides pinned, ready for sewing, ONLY sew ONE side of the crotch together.
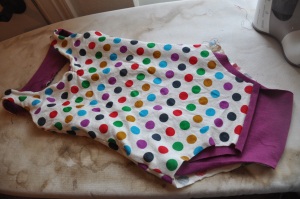
Also, note that I was sewing Fabric A to B to continue the reversible aspect. I did not sew the crotch seam Fabric A to A or B to B together to make it one continuous leotard at the crotch. If you want it one continuous piece, you do that last. You need to leave an opening betweeen Fabric A and B to turn it later. So you can see below how there is a nice seam where the main fabric meets the contrasting fabric, but the crotch is left open. Plus, there should be an opening between Fabric A and B on one of the crotch seams.
BUT Remember, UNLIKE in these photos, one of the crotch seams should be left unsewn. For example, on the FRONT piece, Fabric A and B should NOT be sewn together.
I (still haven’t) decided whether to put snaps on like a onesie (she is potty training) or just sew it all together like a leotard. Right now it is just based together at the crotch while I decide. It may stay basted together until she grows out of it, who knows. I figure in a potty emergency, my supermom strength can rip apart the basting stitches, but for now I don’t have to worry about fiddling with snaps when I put it on.
The only thing left to finish are the leg holes. Again, a headache of sewing leg hole seams together to keep it reversible WITHOUT sewing the leg holes shut. You also have to be able to have an opening to turn it.
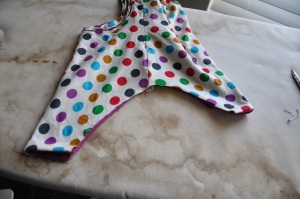
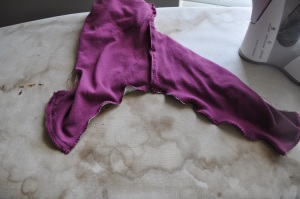
This is folded to match up the leg holes.
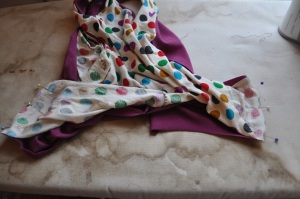
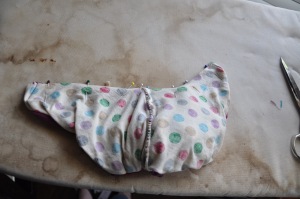
Then somehow, this happened.
The pins are along the leg hole edge. I’m not quite sure how I got the leotard into this kidney shaped wad of fabric, but after staring and thinking, it must have been the right thing to do.
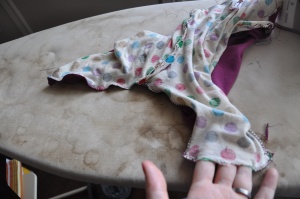
After sewing along this leg hole edge, you get this, where you can see ONE of the leg holes is finished.
Then the birthing process begins. I reached inside the garment and did some things. I think I was just turning it inside out so that I could sew the side seam of the other leg hole.
There you see the other leg hole stitched together.
Here the garment is inside out.
This should never happen once the garment is complete right? It is like a strange 3rd dimension of fabric design, which induces headaches. The very nature of a reversible garment is that there is no wrong side and can never be worn “inside out.” So you are working in this 3rd dimension, where you are sewing something inside out, knowing that once this magical last step occurs, the “inside outness” is hidden somehow inside the reversible garment.
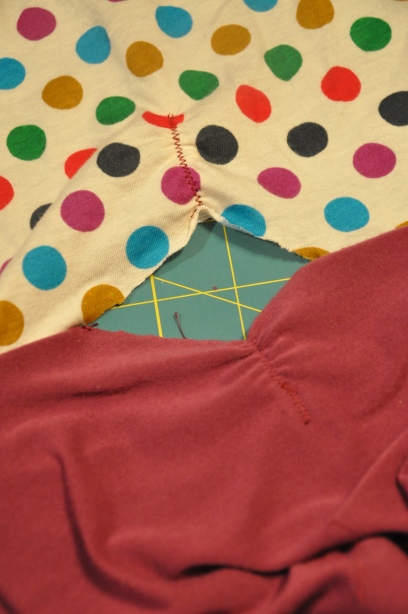
So all the seams are sewn, and it needs to be turned right side out. For me, there was no way to turn it. This is when I realized I shouldn’t have sewn both crotch seams together. Not too big of a mistake, I just cut the seam apart most of the way at the crotch- where my fingers are going into the garment.
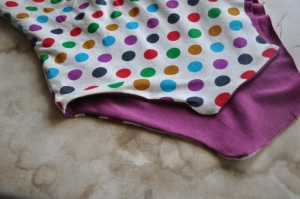
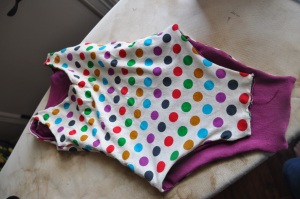
There it is. Turned, and you can see at the crotch there is an opening still. This is a fine place for an open seam, just turn it under and topstitch it together. Or sew both crotch seams together to make one continuous leotard.
Feel free to use “Top Stitched Crotch” as the name of your next Garage Band. Or for a blog name if you are feeling very alternative.
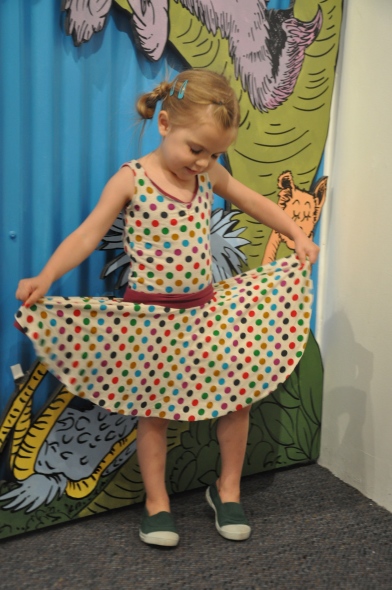
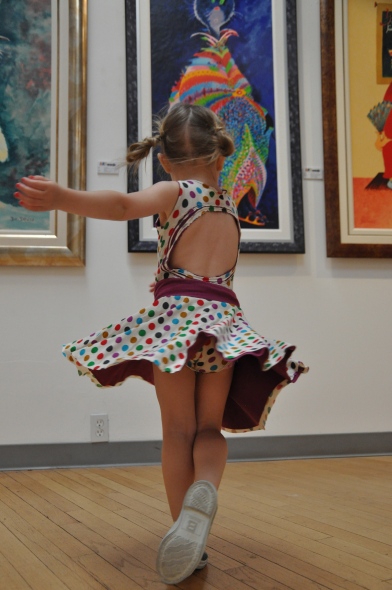
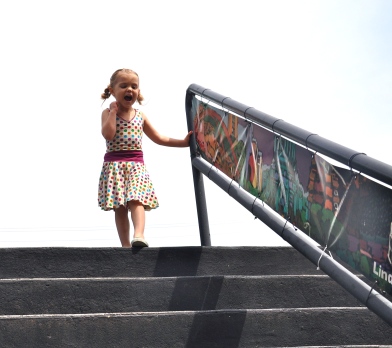
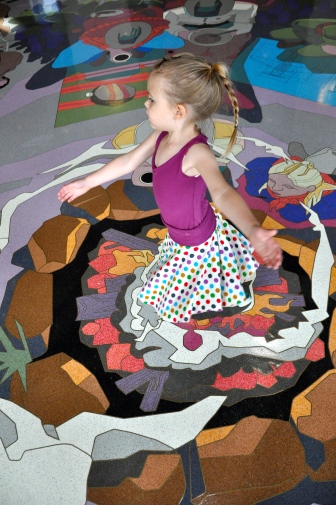
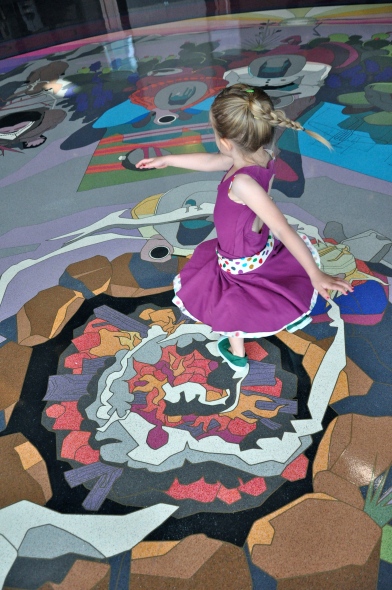
I also topstitched around the neckline- both for aesthetic appeal and to help keep the neckline even so one side didn’t roll up too much on the other. Reversible Leotard and polka dot skirt done! But then…..I checked the PRP blog, and saw that the next sew-along was……a circle skirt remix! And here I had already used that exact tutorial for the skirt! However, I felt that since I had done that BEFORE it was announced, I should revisit the skirt. I was planning to meet my husband downtown to go to the Dr. Seuss exhibit at the Art on 5th gallery that afternoon. I thought…what a perfect outfit to wear to the Dr. Seuss museum, so why not make the circle skirt reversible as well! AND since circle skirts are so easy, I could whip it up in an hour and have time to get ready and get to the exhibit. I used the same pattern piece as for the original polkadot skirt, however I made the purple fabric a little bit longer. I thought it would be nice to have the purple show a bit underneath the polkadot, when the polkadot side is worn out, and then when the purple side is worn out, you wouldn’t be able to tell that the polkadot is a bit shorter.
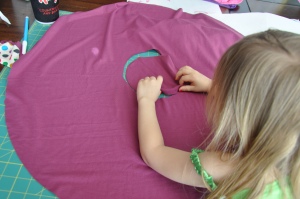
I like involving Fiona in the process when I can, so I had her help me take the middle out. More circles for her to play with!
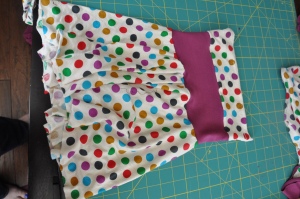
The only problem is that I had already sewn the polkadot skirt waistband. It wasn’t too hard to fix- I just cut along the seam and opened the purple waistband back out. Then, I took a new rectangle tube of polkadot fabric and sewed it onto the purple waistband as shown here:
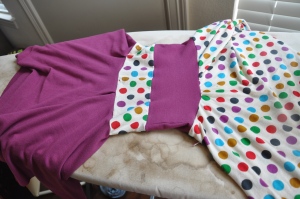
Then, I sewed the purple skirt to the polkadot waistband.
This gives you this strange looking garment. Remember, it is in the 3rd dimension of reversible clothing. This is much easier though, because I am not needing to sew the hem of the skirts together. You just turn one inside the other to get one color skirt, and then reverse it for the other!
Notes:
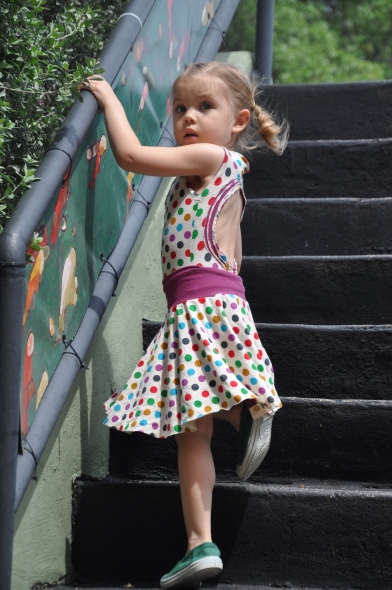
- Post on the Dr. Seuss Museum and the Bob Bullock Texas State History Museum (where the variation pictures are taken) will be upcoming with more photos.
- When I tried the reversible skirt on her for the first time, I thought the purple layer was too low, so I trimmed it without measuring. (By this time I was in a hurry to stay on schedule to get to the museum). It ended up about the same length as the other side, which is ok, but I wanted the purple to peek out, not the polkadot. The polkadot has a “wrong side” while the purple does not. The wrong side doesn’t look bad, as you can see above, but I think I’d like it better the other way. It’s ok if I never get around to it, but I may try adding fabric back on. Lesson here: measure before cutting.
- The MAJOR irony of all of this- Fiona LOVES the polkadot side so much, she REFUSES to wear it any other way. Here I went through such agony figuring out how to make it reversible, and she doesn’t want to wear it on the purple side. It took bribery with gum just to get her to put it on the other way when we went to the Texas museum. That’s how it goes I guess. I’m hoping she will not feel so strongly about it as the summer progresses, because I like trying it different ways.
Pingback: Circus Act Tunic | ONA INK